Food: Macaroni NOT Cheese from Engine 2

Several of my coworkers are taking the “Engine 2 Challenge,” which involves following a plant-based, basically vegan diet for a month. I’ve been trying several of the recipes (when someone at work makes them) and so far I’ve had a great vegan chili and an equally great vegan sloppy joe (both were heavy on lentils). Someone suggested I try the Macaroni NOT Cheese, since regular mac is a favorite of mine. Below is the recipe from the Engine 2 Site, with my notations.
1 onion, chopped
1 cup cashews
1/3 cup lemon juice
1 1/3 cups water
1/2 teaspoon sea salt
4 ounce jar roasted red peppers, drained
3 tablespoons nutritional yeast (THIS IS IN THE BAKING AISLE AND COSTS $6)
1 teaspoon garlic powder
1 teaspoon onion powder
16 ounces whole grain elbow pasta, cooked
Instructions:
Sauté onion on medium heat in non-stick skillet with a little water or low sodium vegetable broth for 5 minutes, until translucent.
In a food processor, combine the onions, cashews, lemon juice, water, and salt. Gradually blend in roasted red peppers, nutritional yeast, garlic powder, and onion powder.
Thoroughly toss the sauce with the pasta.
Bake in the oven for 20 minutes until golden brown on top.
(THROW DIRECTLY IN THE TRASH. THE END.)
Welcome to Weight Loss Month, AND Turkey Chili

I’m pulling out all the stops for this year’s Annual Weight Loss Month Or So. (See all my gluten free entries for the theme of last year’s Annual Weight Loss Month Or So.) This year I’m using my new FitBit Force (thanks mom!) in conjunction with the Lose It! App I’ve been using for the past year minus the last few months. I’m going gluten-reduced, and focusing on increasing any possible daily activity (hence the fitbit) and eating lots of greens and low fat protein. Oh, and as much hot yoga as I can get to, because I love it. (Insert shameless plug for CorePower Yoga here.) This chili has approximately 200 calories per 1 cup serving (not including toppings), is easy to make, and filling. Plus, beans are good for you.
1 tablespoon olive oil
2 carrots, chopped
1 yellow onion, chopped
1 red or green pepper, chopped
2 teaspoons ground cumin or latin spice blend (available in most grocery stores, try Whole Foods)
1 pound ground turkey (leanest you can find)
1 (28-ounce) can crushed tomatoes
2 cups water
1 chipotle chile in adobo sauce (seeded and chopped)
juice from 2 limes
Salt and black pepper
1 can black beans and 1 can kidney beans (or whatever combination of beans you like), drained
Optionally toppings:
Avocado, chopped (or guacamole)
Scallions, chopped
Cheddar cheese, shredded
Non fat greek yogurt or sour cream
Put the onion, pepper, and carrots in a large pot with the oil, cook over medium heat, stirring occasionally, until vegetables are soft. Add the spice mix or cumin and stir until incorporated. Add the turkey, raise the heat and cook until meat is no longer pink. Add tomatoes, lime juice, water, chipotle, and salt. Cover and simmer at least 30 minutes. Add beans and cook, partially covered, at least 10 minutes longer.This can be eaten immediately but is best when left on low heat for a few hours. Season to taste before serving with more salt, pepper, or lime juice.
It’s My Birthday

It’s my birthday. Here are some things:
After 34 years I’ve finally realized that new year’s resolutions are no good for me because a) my resolutions usually involve eating less cake but my birthday is less than a month away and necessitates cake and b) January kind of sucks and I just want to eat meatballs and wear fat sweaters.
I periodically find gray hair now, and I. Hate. It.
I feel 10 years older, thank you very much, but in a good way.
Last year I learned how to get married, and not just in the “what color flowers for the bouquet” way. The cat and I learned how to live in a tiny space with a wonderful man and his wonderful dog. Hopefully this year I’ll learn how to buy a house with said man and dog. I learned how to build a team from scratch and to open a business with that team, and to work harder than I ever have. I learned how to do yoga in a very hot room. I learned that I miss writing on a regular basis, and that I need to get back to this blog. I learned, again and again, how awesome and supportive my friends and family are.
And I got to wear a fabulous, fabulous dress.
It was a good year.

STILL GOOD: Veggie Skillet Cakes with Green Goddess Dressing
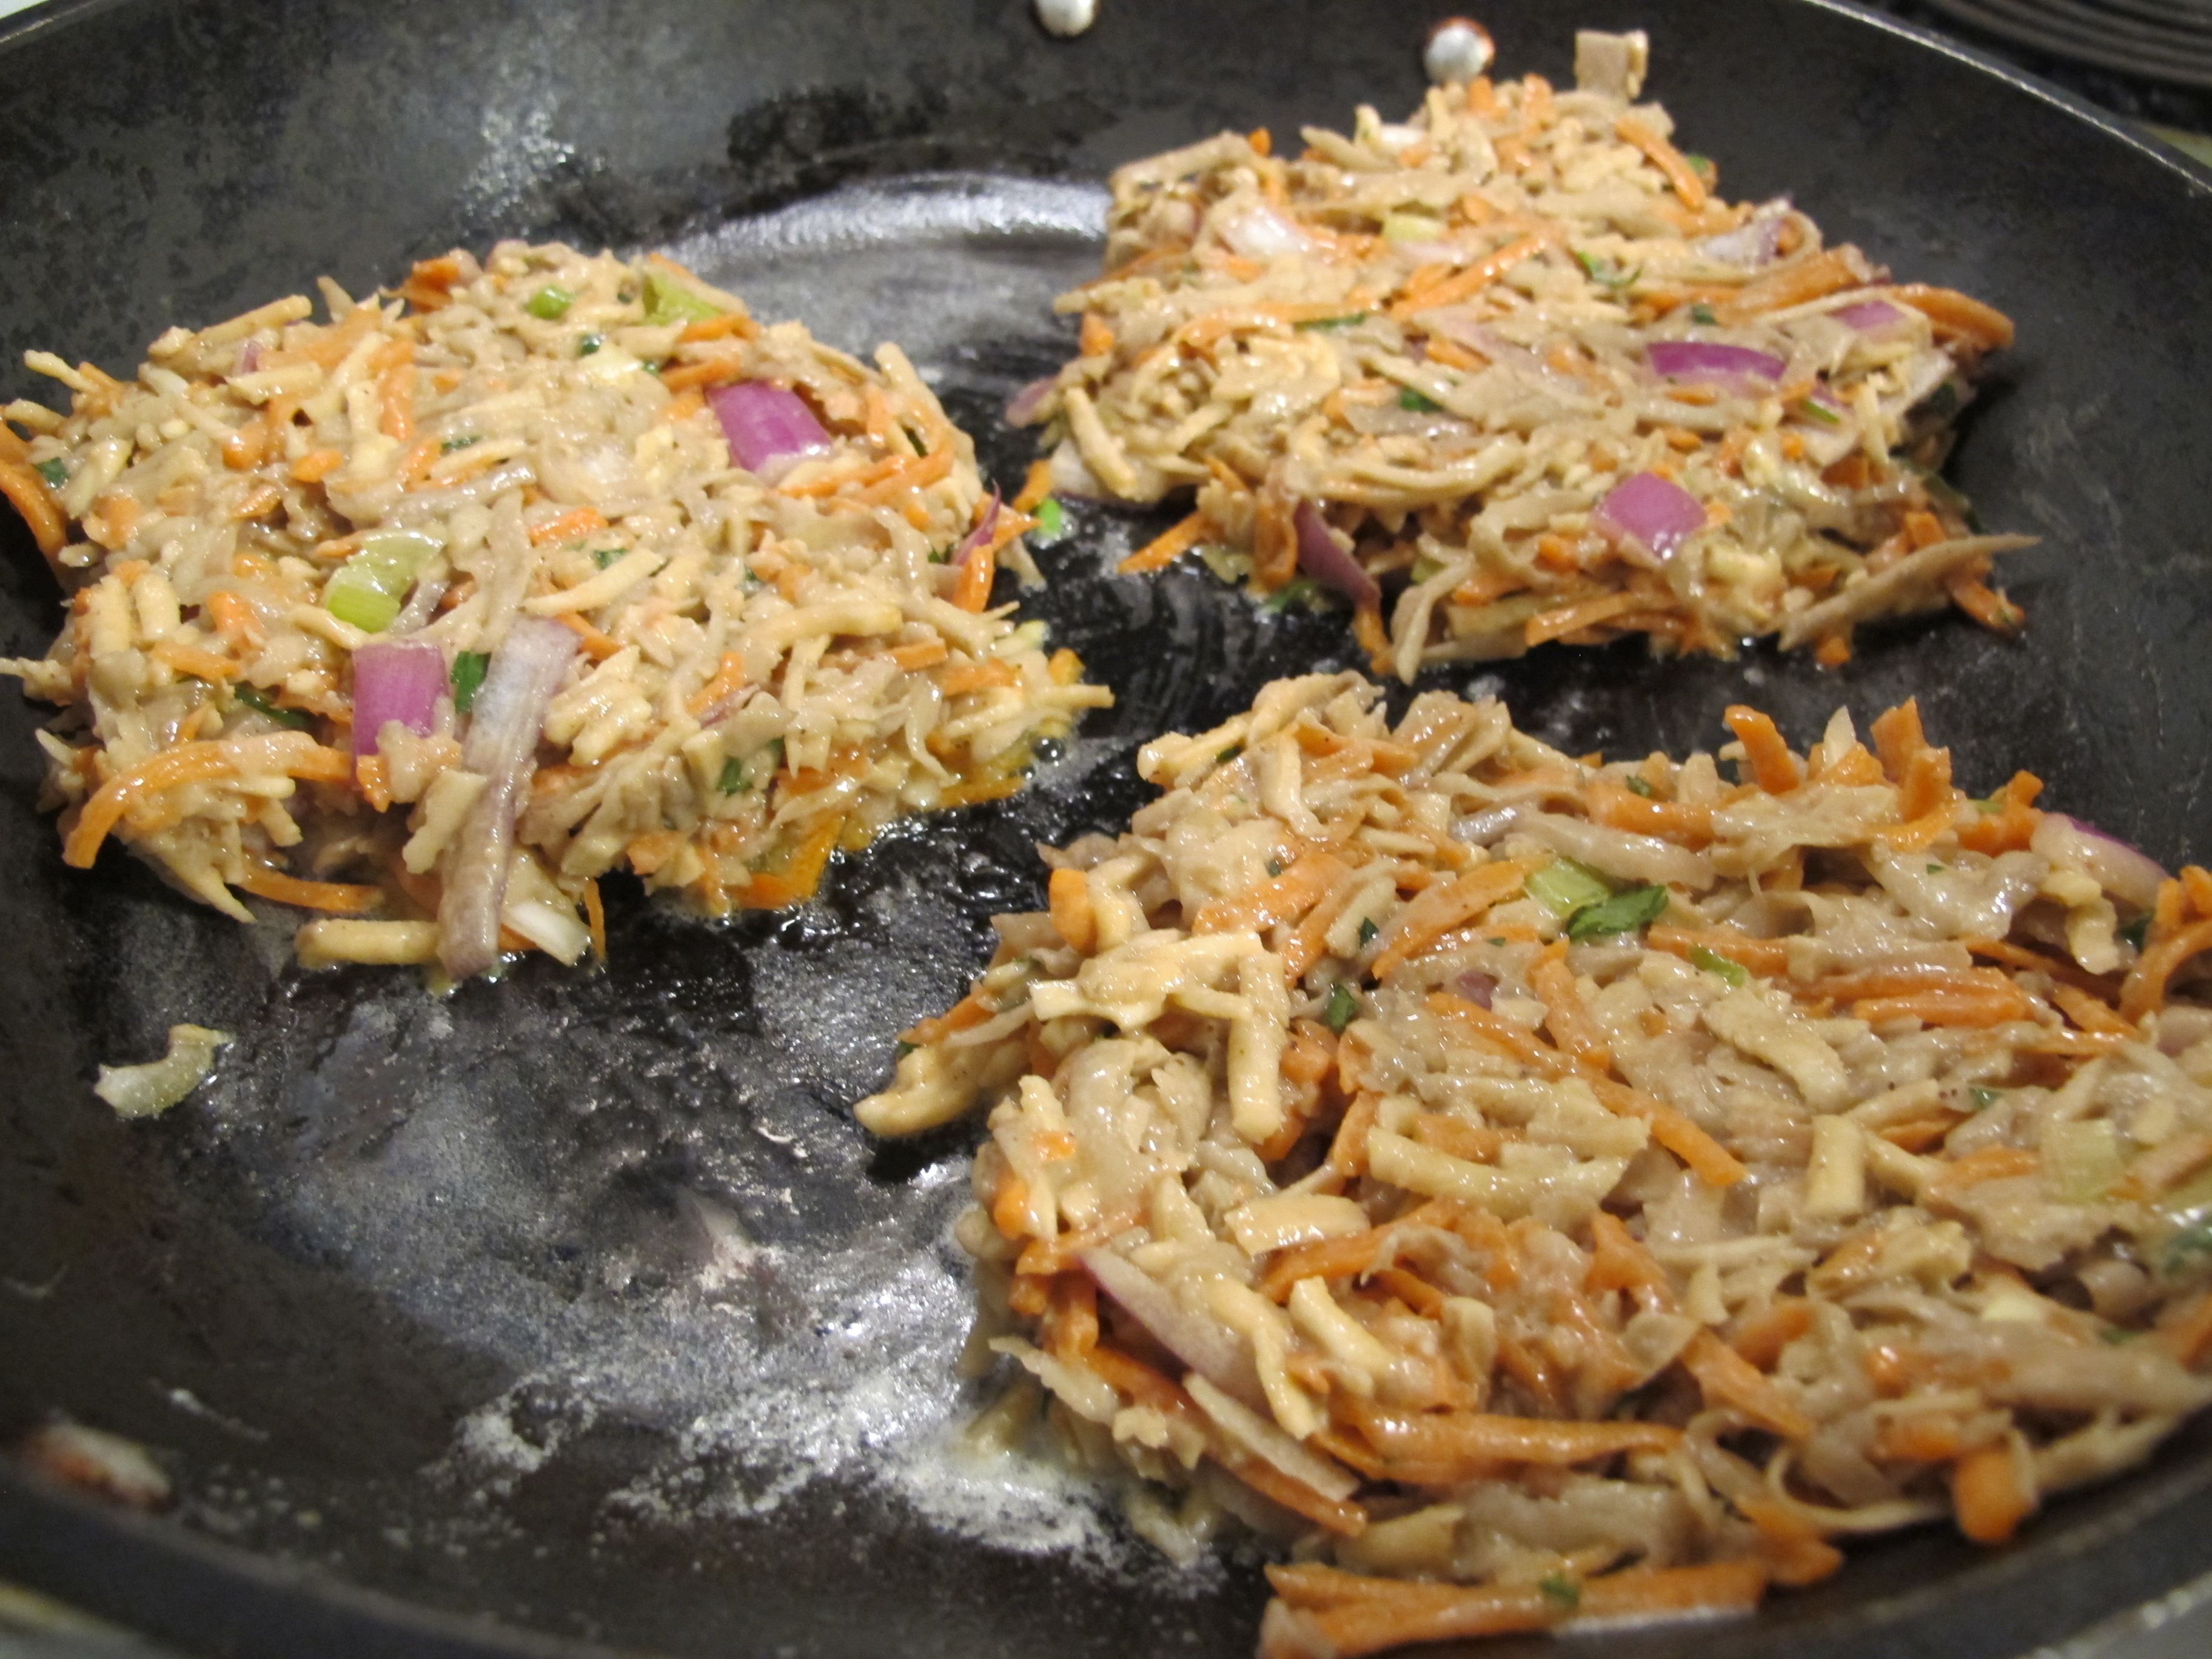
These are really good, and a lot healthier than regular potato pancakes with sour cream. The original recipe comes from Whole Foods Market, and you can see below for the ways I messed it up the first time, and then the tweaks I made to the original recipe and cooking method, and the addition of Green Goddess Dressing.
Ingredients:
3/4 teaspoon chili powder
2 (8-ounce) russet potatoes, peeled, shredded and squeezed of excess moisture (SQUEEZED WITH A PAPER TOWEL. MESSY. USE REGULAR TOWEL.)
4 tablespoons unsalted butter
2 parsnips, shredded
1 large egg, lightly beaten (DID NOT BEAT)
2 carrots, shredded
1 teaspoon fine sea salt (USED WHATEVER SALT I HAD)
1/2 cup finely diced red onion (ONLY HAD YELLOW ONION)
1/8 teaspoon grated nutmeg (WAS OUT OF NUTMEG AND DIDN’T WANT TO BUY MORE FOR LIKE, TWO DASHES OF NUTMEG.)
1/4 cup unbleached all-purpose flour
1 large egg white, lightly beaten (WHAT? NO.)
Melt butter in a small saucepan over medium-low heat, until it begins to sputter and is covered with a layer of foam, 2 to 3 minutes. Remove from heat and wait until sputtering stops. Skim off and discard foam; pour clarified butter into a small bowl, leaving behind any milky liquid. (THIS SEEMED LIKE A STUPID EXTRA STEP. JUST MELTED SOME BUTTER.)
In a large bowl, combine the vegetables and onion. Sprinkle with flour, salt, chili powder and nutmeg, and toss to coat. Stir in egg and egg white. (I JUST USED TWO EGGS AND MASHED EVERYTHING TOGETHER WITH MY HANDS.)
Brush a large skillet with clarified butter and line just the bottom with parchment paper. (PAIN IN THE ASS.) Brush the paper and sides of the skillet generously with 1 tablespoon more clarified butter. Heat the skillet over medium heat until hot. Pour in vegetable mixture and press gently. Cook, running a spatula around the edges of the skillet occasionally, until bottom is very brown, about 12 minutes. (BOTTOM WASN’T GETTING BROWN, GOT IMPATIENT*. TURNED UP HEAT.) *THE START OF ALL PROBLEMS, ALWAYS.
Place a round platter upside down over the top of the skillet. Grasp sides of the skillet and platter with oven mitts and invert pancake onto the platter. (THIS SEEMED LIKE A LOT OF ACROBATICS. BUT I DID IT!) Press back in any stuck bits of pancake. (PLENTY OF STUCK BITS) Wipe the skillet clean, place parchment back in the skillet and brush generously with clarified butter. Slide pancake back into the skillet (browned-side up) and continue to cook over medium heat, loosening edges with a spatula and shaking the pan occasionally to loosen the bottom. (STARTING TO SMELL SOMETHING BURNING, BUT PANCAKE LOOKED OK.) Cook until bottom is browned and crisp and pancake is cooked through, about 12 more minutes. (AT ABOUT 10 MINUTES REALIZED PARCHMENT PAPER WAS ON FIRE. HAD TO REMOVE) Invert the skillet again to remove pancake. Cool 5 minutes before cutting into wedges. (PANCAKE WAS MORE OF A HASH AT THE END, AND A LITTLE CHARRED. BUT STILL GOOD.)
MY EASIER, LESS HEALTHY, PARCHMENT PAPER FREE VERSION:
Ingredients:
1 red onion, sliced
2 parsnips, peeled and grated
2 carrots, peeled and grated
2 russet potatoes, peeled and grated, squeezed and drained of excess liquid
2 scallions, diced
1/4 cup parsley, chopped
1 tsp chili powder
1/2 tsp nutmeg
3 eggs
1 cup flour
1 stick butter
Add all ingredients except for butter to a bowl, mix with your hands until eggs and flour are incorporated. Heat a non-stick skillet on medium and add 1/4 stick of butter. Drop mixture by heaping spoonfuls (you can make these as big or as small as you want, depends on how long you want to spend cooking) into skillet, and cook over medium heat until both sides are browned (at least 5 minutes per side, depends on how big you make them). Press frequently with spatula to keep them in pancake form, but if these fall apart you can just cook them into a hash and they are just as tasty. Let skillet cool between batches and add more butter before each batch. Top with Green Goddess Dressing, recipe follows.
Green Goddess Dressing:
2 cups 0% (fat free) greek yogurt
2 scallions
juice of one lime
juice of 1/2 lemon
salt and pepper
4 gloves garlic
at least 1 cup chopped basil, have two cups available so you can adjust if it is not basil-y enough
Throw everything in a blender and puree. Add more basil if you want. Puree again. The end. This should last 4-5 days in the fridge.
Feast: Dinosaur BBQ, Syracuse NY
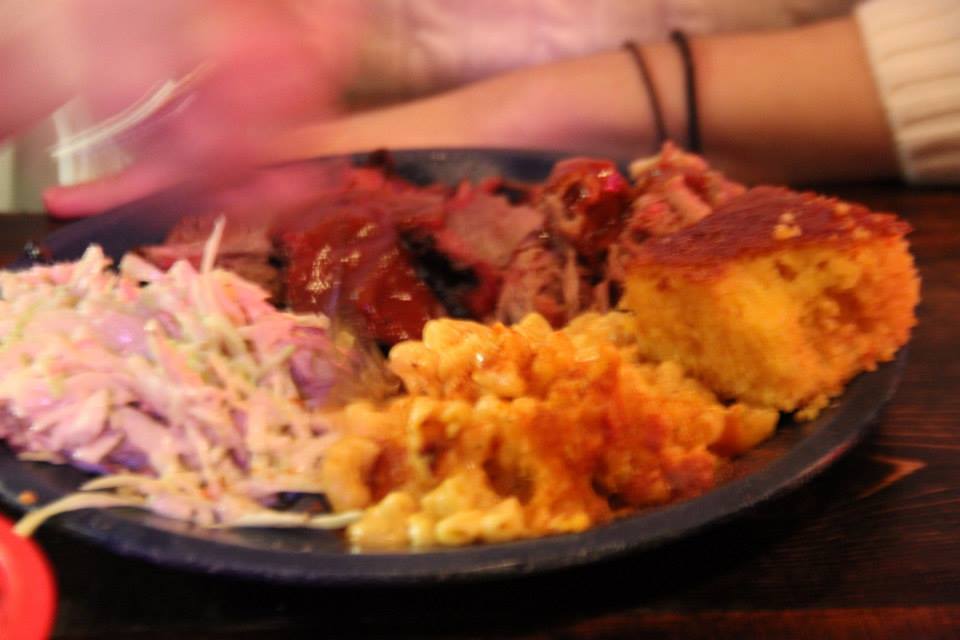
photo by dave copeland
Dinosaur BBQ is now a chain with 7 locations, but back in the day the original, in Syracuse, NY, was not the place you’d take your wife for dinner before a weekend with her friends and their babies. In the last ten years it has gone from biker bar to group hang out spot, but the decor is still pretty honky tonk, with license plates and signs that read “temperance ignored here” on the walls.
The food is quick and rich – brisket, pulled pork, ribs, fried green tomatoes, deviled eggs, cornbread. I had brisket and pulled pork with a side of mac and cheese and coleslaw, and while it was all good, I particularly enjoyed the brisket- tender without being fatty – and the mac and cheese. Most BBQ joint mac is dry and tasteless, but this is something you want a full bowl of. Judging by the amount of hits you get by googling “Dinosaur BBQ mac and cheese recipe,” it looks like many have tried to imitate it, and for good reason.
If you’re driving through Syracuse, this is a must stop destination. Otherwise, you might want to try the Harlem or Brooklyn locations.

photo by dave copeland
NOT GOOD: Lemon Meringue Pie

my pie looked good, but not this good (photo from foodnetwork.com)
One of my husband’s favorite desserts is lemon meringue pie, so this Thanksgiving I set out to make one. I immediately jinxed myself by remarking that the recipe didn’t seem too complicated, and in true form, ruined the pie completely. Now I’m going on a quest to find an error-proof lemon meringue pie to redeem myself, but for now, here’s all the ways I messed up Alton’s Brown recipe:
Lemon Filling:
- 4 egg yolks (reserve whites for meringue)
- 1/3 cup cornstarch
- 1 1/2 cups water
- 1 1/3 cups sugar
- 1/4 teaspoon salt
- 3 tablespoons butter
- 1/2 cup lemon juice (USED JARRED LEMON JUICE)
- 1 tablespoon finely grated lemon zest
- 1 (9-inch) pre-baked pie shell (THOUGHT PIE SHELL WAS PRE-BAKED. WAS NOT.)
- 1 recipe Meringue, recipe follows
Adjust the oven rack to the middle position. Preheat oven to 375 degrees F. Whisk egg yolks in medium size mixing bowl and set aside. In a medium saucepan, combine cornstarch, water, sugar, and salt. Whisk to combine. Turn heat on medium and, stirring frequently, bring mixture to a boil. Boil for 1 minute. Remove from heat and gradually, 1 whisk-full at a time, add hot mixture to egg yolks and stir until you have added at least half of the mixture. (NOT SURE WHAT I DID WRONG HERE, BUT EVENTUAL PIE WAS TOO SOUR AND FILLING WAS NOT THICK ENOUGH. IF I HAD TO GUESS, SHOULD HAVE USED JUICE FROM ACTUAL LEMON AND MORE CORNSTARCH.)
Return egg mixture to saucepan, turn heat down to low and cook, stirring constantly, for 1 more minute. Remove from heat and gently stir in butter, lemon juice, and zest until well combined. Pour mixture into pie shell (AGAIN, THOUGHT SHELL WAS PRE-BAKED. WAS NOT. PUT FILLING INTO RAW SHELL.) and top with meringue while filling is still hot. Make sure meringue completely covers filling and that it goes right up to the edge of the crust. Bake for 10 to 12 minutes or until meringue is golden. ( MOTHER SABOTAGED PIE. SHUT OVEN OFF JUST AS I PUT PIE IN.) Remove from oven and cool on a wire rack. Make sure pie is cooled completely before slicing.
Meringue Topping:
- 4 egg whites
- 1 pinch cream of tartar
- 2 tablespoons sugar
Place egg whites and cream of tartar in the bowl of a stand mixer fitted with the whisk attachment. Beat egg whites until soft peaks form and then gradually add sugar and continue beating until stiff peaks form, approximately 1 to 2 minutes. Use to top lemon filling. (MERINGUE WAS REALLY EASY TO MAKE! BUT, DID NOT MATTER AS ONCE PIE COOLED THE UNBAKED CRUST MADE IT COMPLETELY DISGUSTING.)
Don’t worry Dave, I’ll get this right eventually. I’ll start by baking the crust.
Canadian Thanksgiving, Eh?
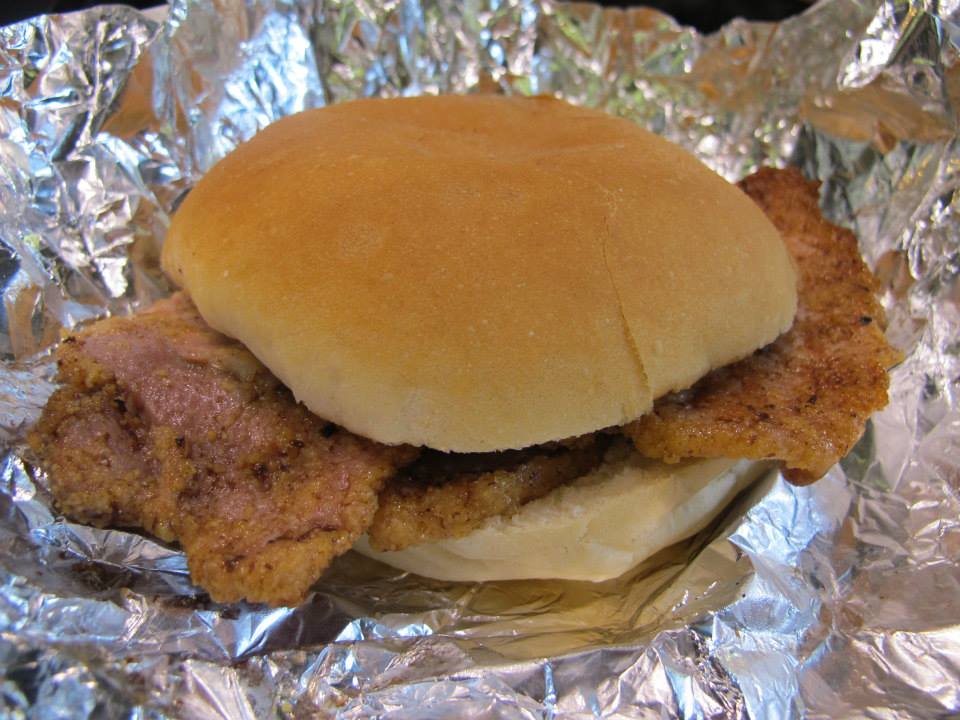
This year, Dave and I went to Toronto on our mini-moon, not realizing that the day after our wedding was Canadian Thanksgiving, eh. Fortunately Canada doesn’t shut down the way we do, and we enjoyed feast after feast. In particular, we asked a local chef where to grab breakfast. He gave the perfect answer: “You go to St. Lawrence Market, you get a plain peameal bacon sandwich. No egg, no tomato- you can get an egg sandwich anywhere. Peameal Bacon Sandwich.” Peameal bacon is sort of like our version of “Canadian” bacon, only so much better. Dusted in cornmeal, it is tender and juicy. The sandwich itself made me want a nap afterward, but well worth it.
This year on Thanksgiving, I am thankful for my new husband, my family and friends, my health, and all future opportunities to discover new, delicious things.


STILL GOOD: Cherry Cheesecake Cupcakes
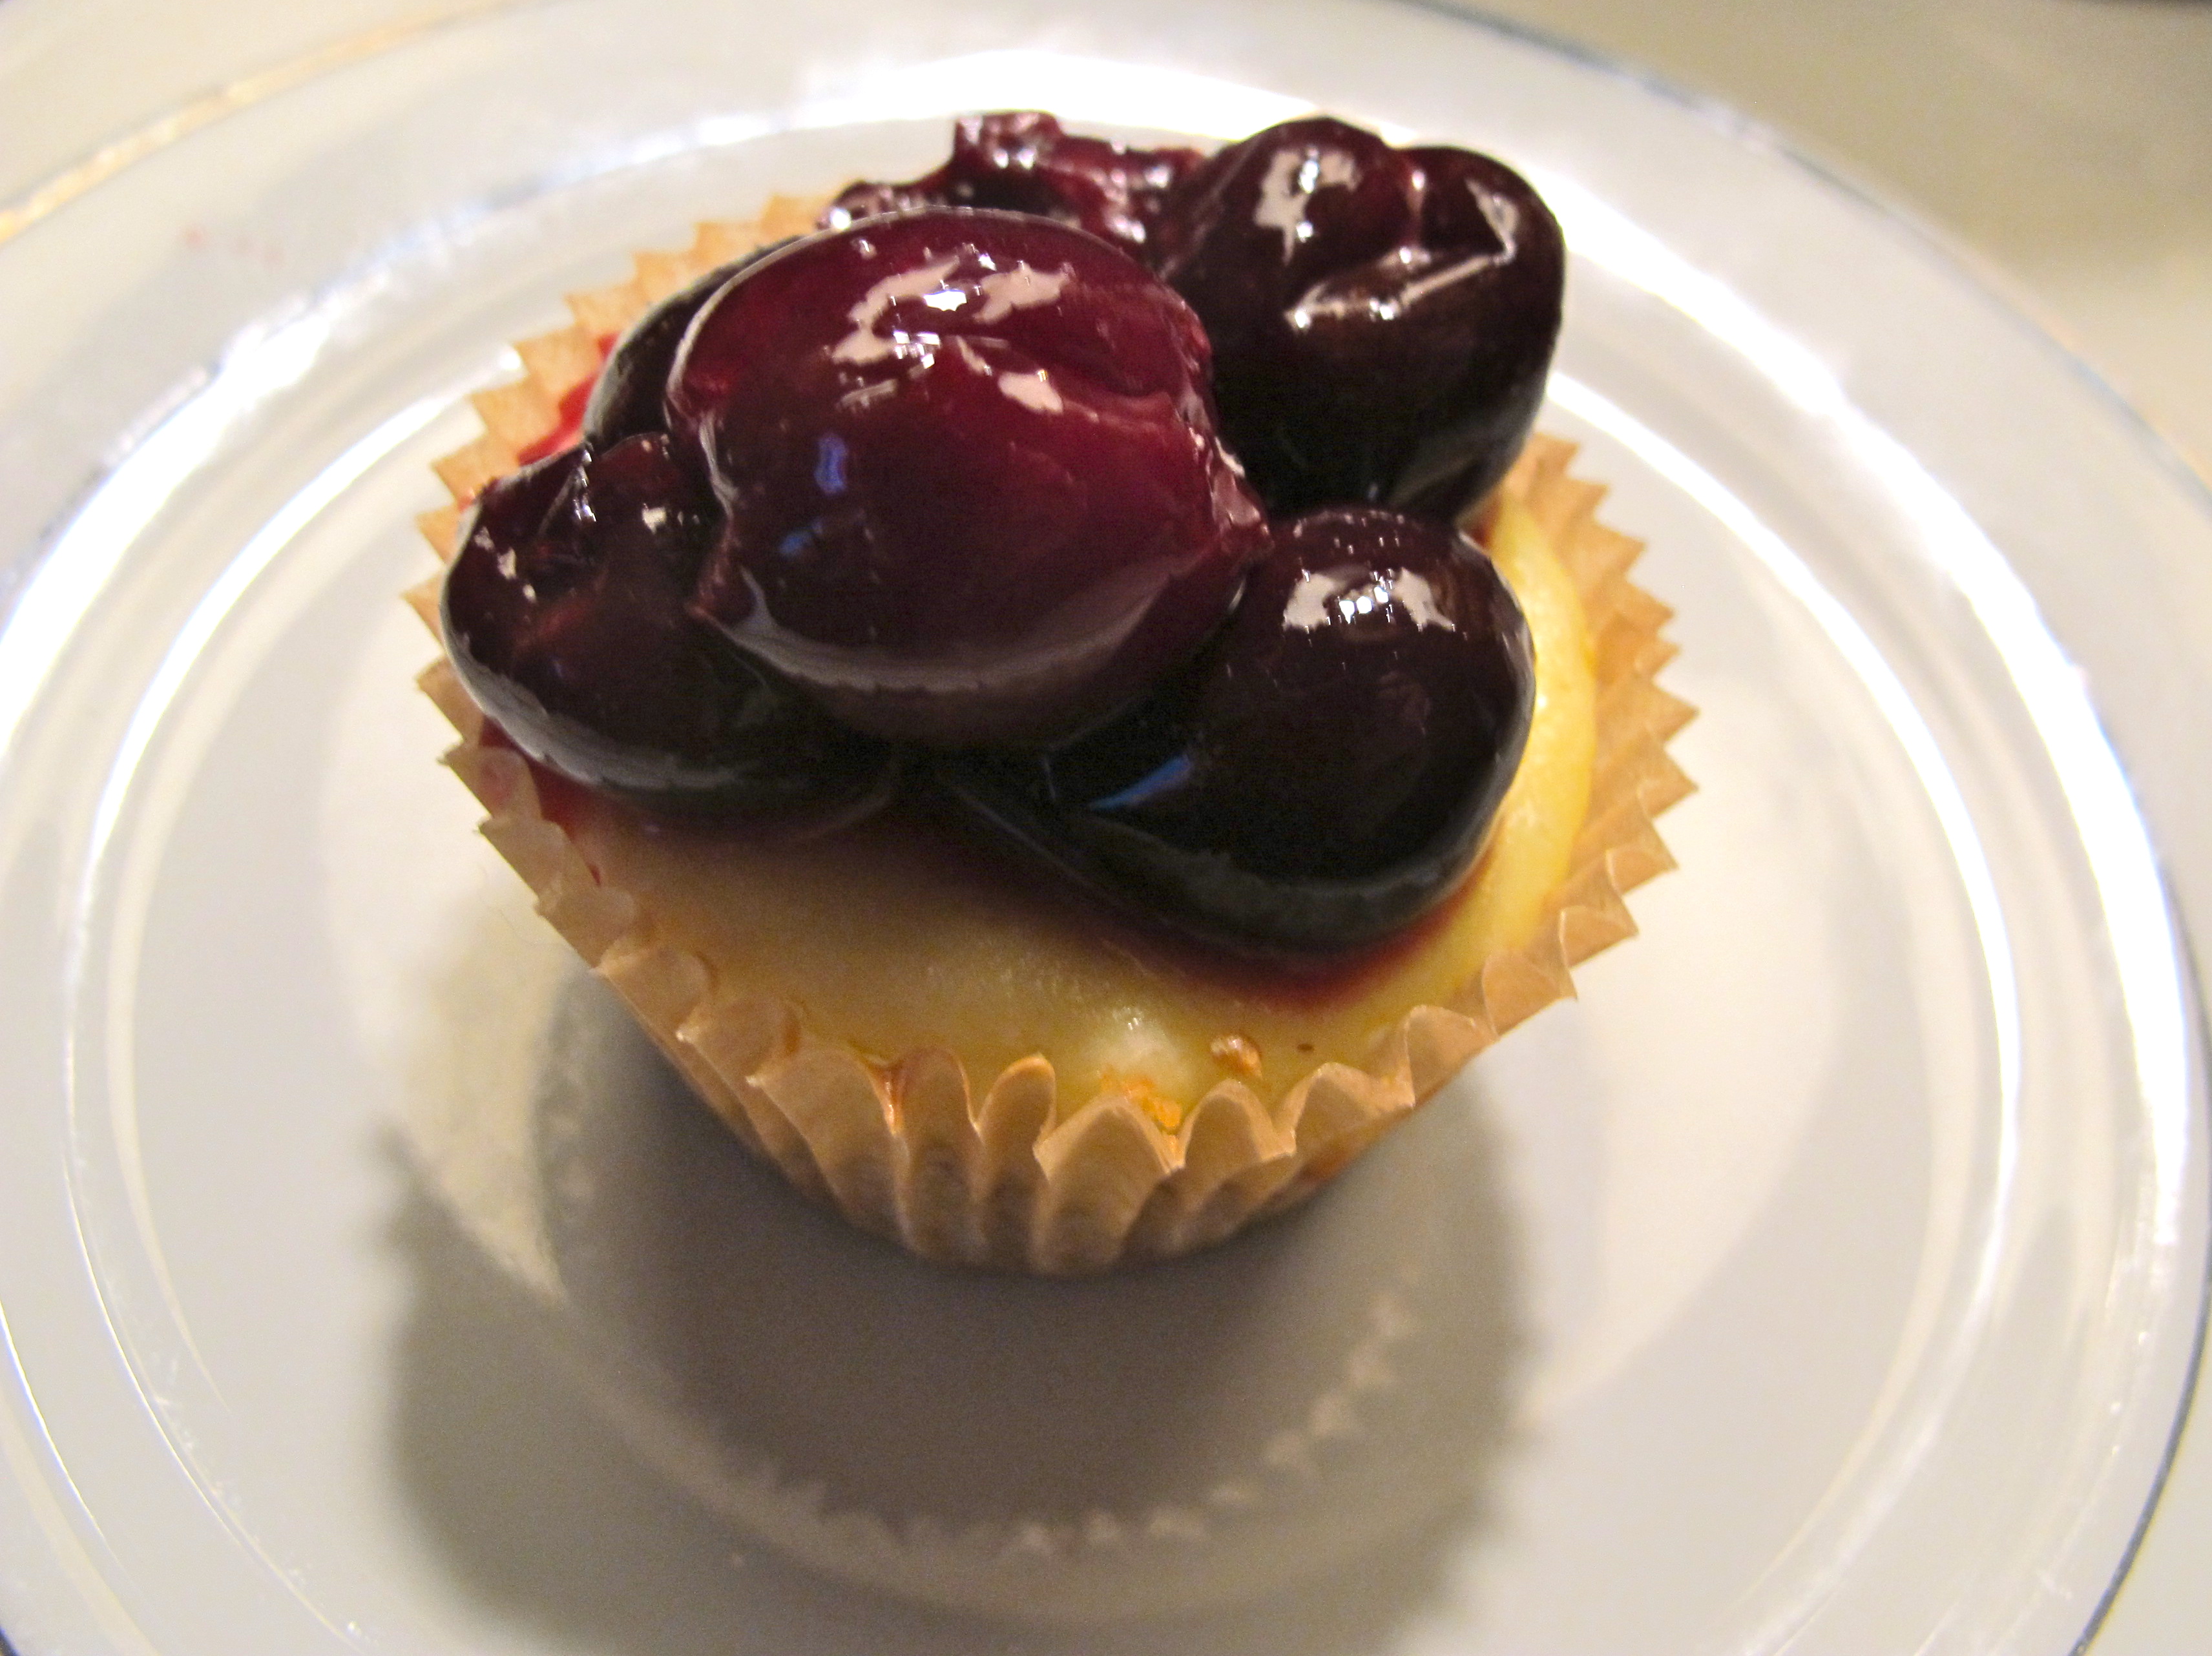
My mom used to make these at Christmas and I loved them. I could never get enough of them and since they are so small, it didn’t seem so bad to have three or four. Now it seems kind of wrong to have that many, but that doesn’t mean I don’t do it.
Thanks to It’s Yummi.com for the recipe used in this installment of “Still Good: Recipes that still work even after I get my hands on them.”
- 2 1/4 cups graham crackers, finely crushed (about 14 sheets)
- 2 Tablespoons granulated sugar
- 5 Tablespoons unsalted butter, melted
- 4 (8 oz) packages cream cheese, softened
- 1.5 cups granulated sugar
- 3 Tablespoons all-purpose flour
- 4 large eggs
- 2 teaspoons lemon extract (DID NOT BUY. COMPLETELY MISSED THIS INGREDIENT.)
- 1/2 cup sour cream
- 1/2 cup heavy whipping cream
- For the topping
- 4 cups sweet cherries, fresh or frozen
- 1/2 cup granulated sugar
- 3 tablespoons cornstarch
- 3 tablespoons cold water
- 1/4 teaspoon vanilla extract
- 1 jar hot fudge sauce (DID NOT BUY. YOU DO CHERRIES OR YOU DO CHOCOLATE, NOT BOTH)
- Heat oven to 350 degrees (AGAIN, OVEN IS A BITCH. SET TO 350, TODAY CLIMBED TO 310, BUT BASED ON PREVIOUS BEHAVIOR WHO KNOWS?)
- In a large bowl, whisk together graham crackers and 2 tablespoons granulated sugar. Pour in melted butter and stir with spoon until evenly coated. (ONCE MADE DID NOT SEEM RIGHT. POURED OUT ABOUT HALF OF MIXTURE AND ADDED SOME MORE BUTTER. NO MEASURING WAS INVOLVED.) Divide graham cracker mixture among 24 paper lined muffin cups, adding a heaping teaspoon full to each. (24 SEEMED LIKE TOO MANY TO HAVE IN THE HOUSE SO AT THIS POINT DECIDED TO HALF THE RECIPE.) Press mixture evenly into each cup. Bake in oven for 5 minutes. Remove from oven and cool while preparing filling.
- In large mixing bowl, add softened cream cheese, 1.5 cups sugar, and flour. Use a hand or stand mixer to mix on low speed until well blended and smooth. Add eggs, one at a time, and blend on low speed just until combined after each addition. (USED THREE THINGS OF CREAM CHEESE, THREE EGGS, SAME AMOUNT LISTED OF EVERYTHING ELSE. SO, SORT OF HALF. OMITTED THE CREAM BECAUSE IT SEEMED* THAT WOULD MAKE IT TOO WATERY. *NOT SURE WHY ALL OF A SUDDEN I THINK MY BAKING INTUITION IS SO GOOD.) Scrape down sides of bowl with a spatula as necessary. Add vanilla, sour cream and whipping cream and mix just until combined.
- Tap mixing bowl against counter top about 30 times to release some of the air bubbles. (DID NOT DO.) Divide mixture among muffin cups, filling each cup nearly full. Bake in heated oven for 20 to 23 minutes; centers should still jiggle slightly… don’t overbake! (If tops begin to crack, they’ve been baking too long). (FOUR OF MINE CRACKED.) Remove from oven and allow them to cool in the pan on a wire rack for 1 hour. Cover loosely with plastic wrap and transfer to refrigerator to chill for at least 2 hours.
- To garnish before serving, place a dollop of cherry topping on top (directions for preparation below).
- For the cherry topping: In a small bowl, whisk corn starch and cold water to make a slurry; set aside.
- Place cherries and sugar into large microwave-safe bowl. (USED TWO CUPS CHERRIES AND 1/4 CUP SUGAR, AND HALF OF SLURRY.) Stir to combine and microwave on high for 2 minutes, stirring after the first minute. Add cornstarch mixture to the cherries and continue cooking on high for 2-3 minutes, stirring briefly every 30 seconds. (FORGOT TO STIR BRIEFLY EVERY 30 SECONDS.)
- Remove from microwave, stir in vanilla extract and chill until ready to serve. (TOO COOL FOR SCHOOL: DECIDED NOT TO MEASURE VANILLA AND WAY TOO MUCH CAME OUT OF BOTTLE. CHERRIES TOO VANILLA-Y, BUT, STILL GOOD!)

Food: Garlic Cheddar Risotto
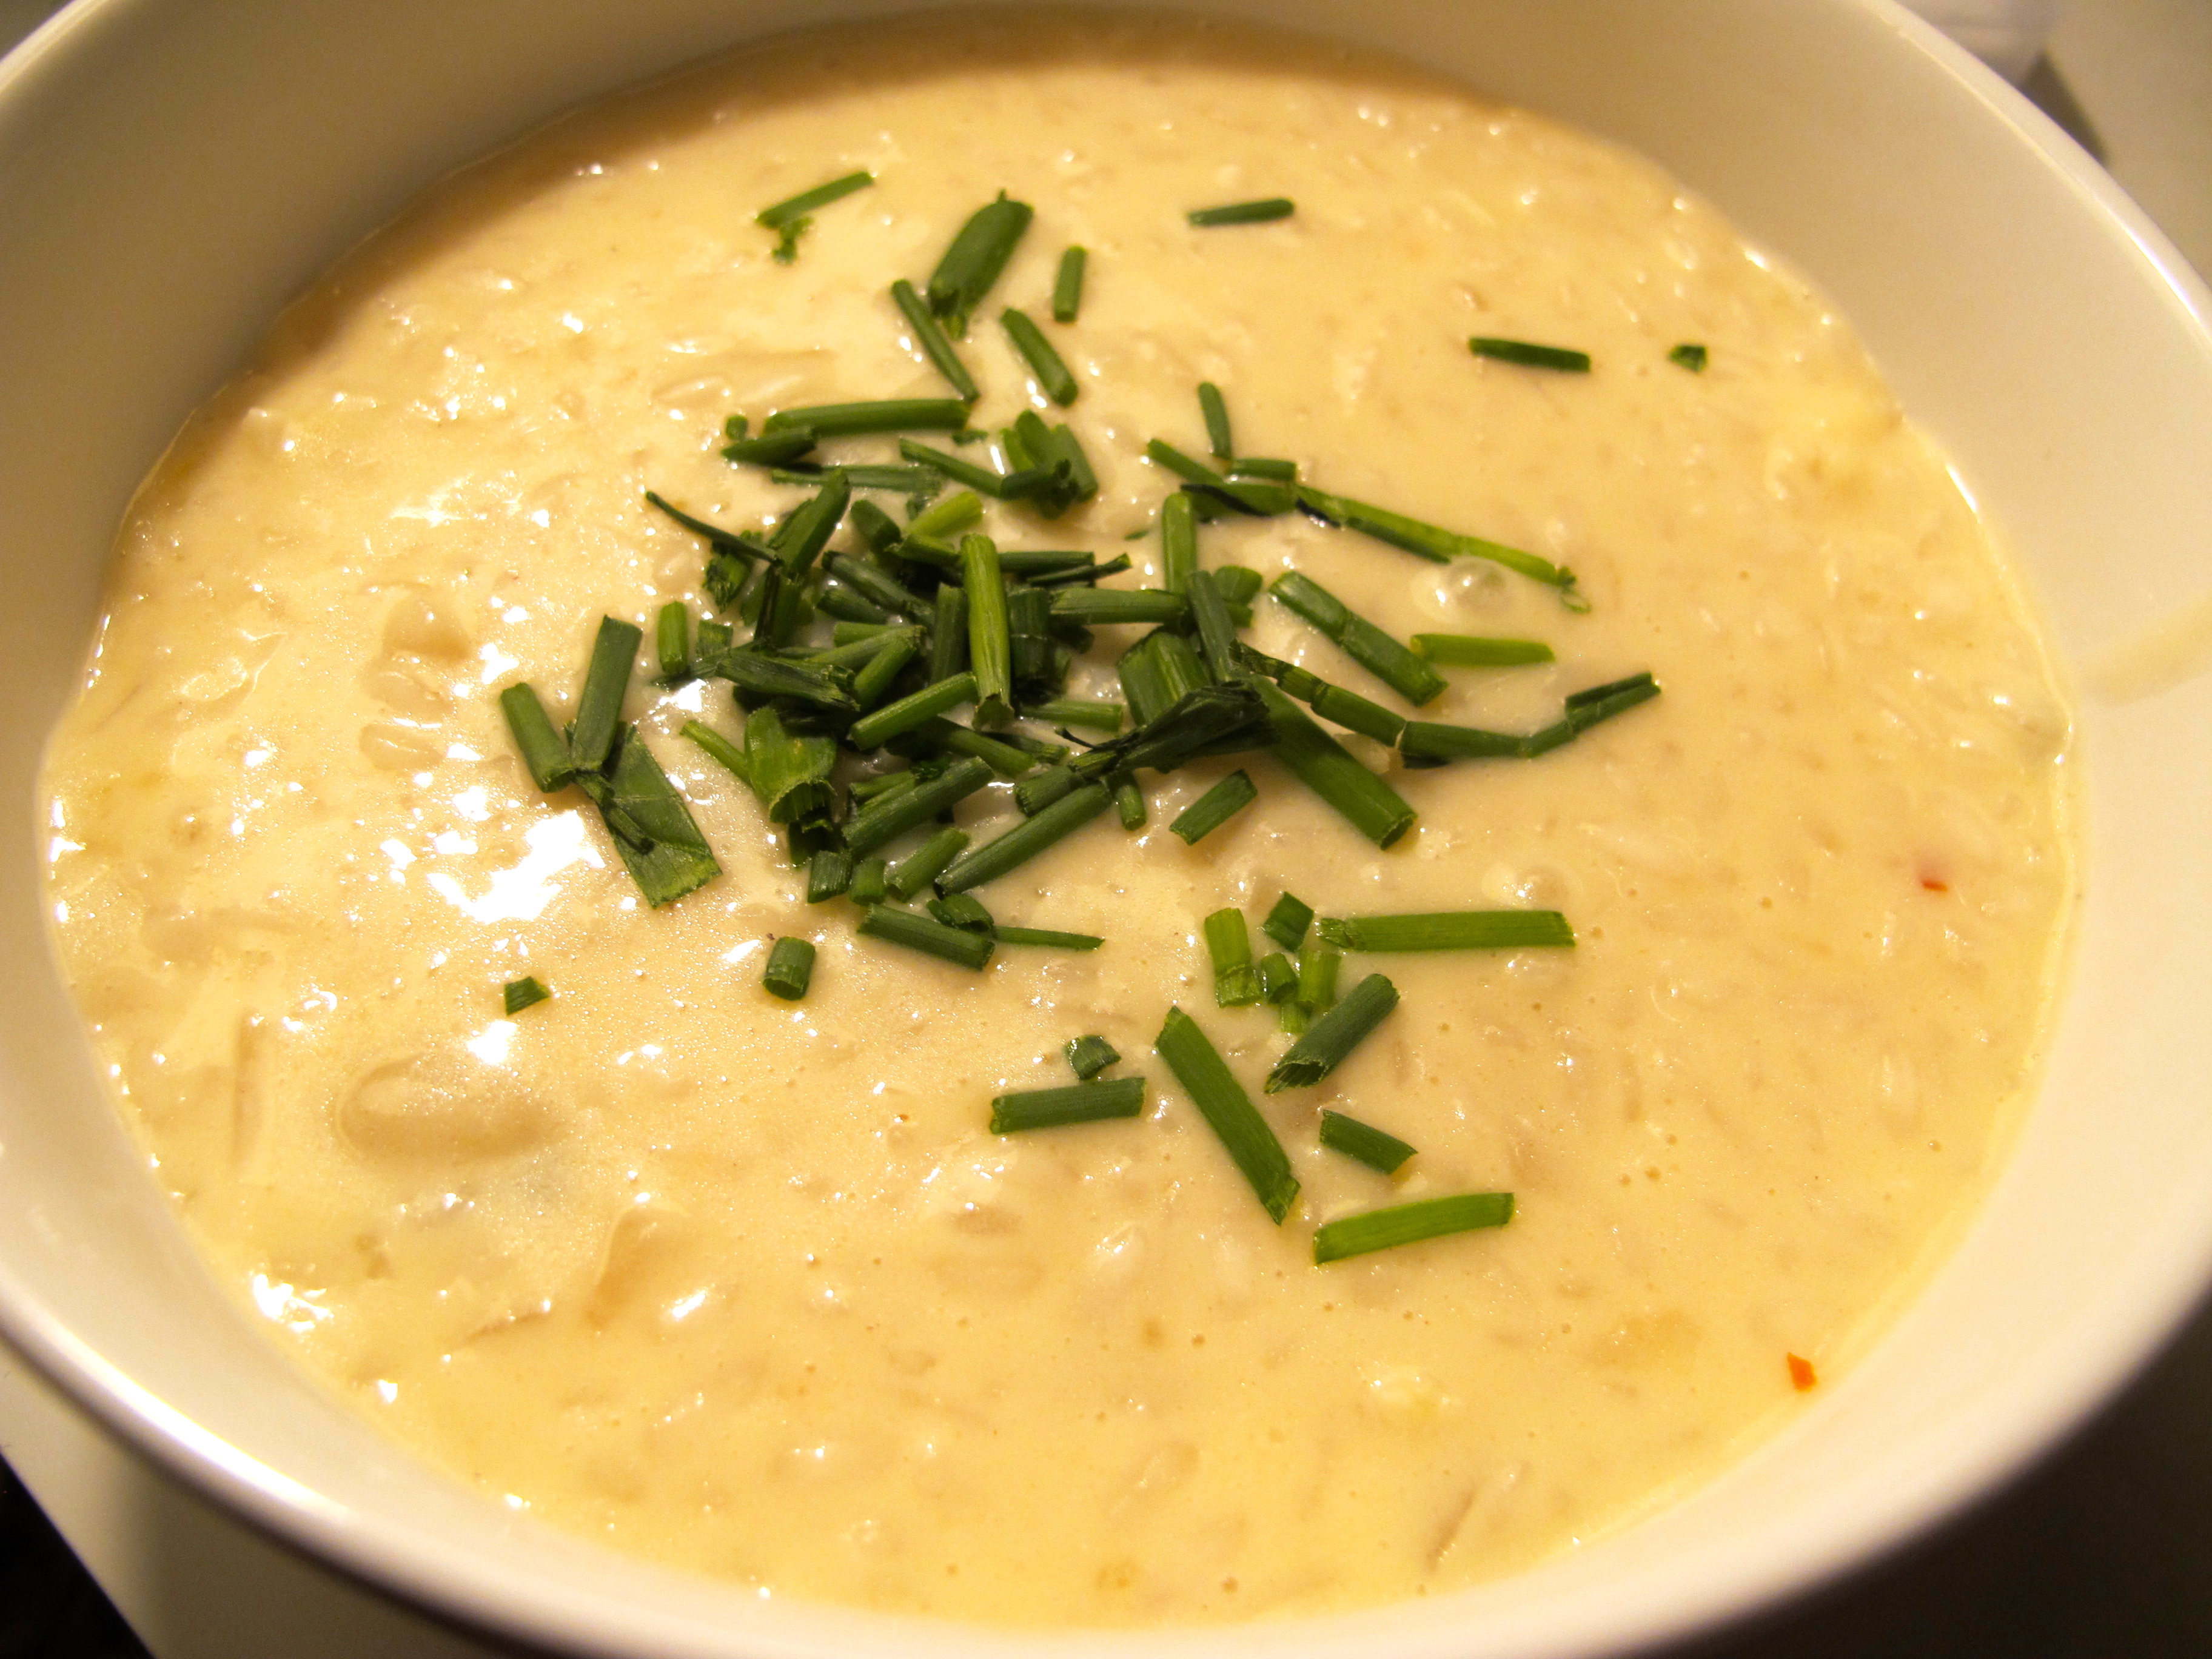
More risotto! This is a combination of Mio’s Mac and Cheese and Nigella’s Cheddar Cheese Risotto. The danger with mac and cheese is that it can become too dry – especially if you bake it for too long. The danger with risotto is that it can become too gluey – especially if you don’t add enough liquid or let it sit for too long. The good thing about this recipe is that it combines both worlds but minimizes the risk. If you want to make this a faux mac and cheese, top with panko breadcrumbs after toasting in some butter.
Cheddar Cheese Risotto – serves four
2 cups arborio rice
8 cups chicken broth
1/2 cup dry white wine
1 onion
4 cloves garlic
2 cups shredded sharp cheddar cheese
1/2 cup sour cream
1 tsp Dijon mustard
1/2 cup parmesan cheese
2 tbsp chives, chopped
1 tsp red pepper flakes
2 tbsp butter
Variation:
two links chorizo sausage, browned
Heat the chicken broth in a separate pot until warm. Brown the onion and garlic in a few tablespoons of olive oil over medium heat. Add the rice and stir to mix everything over medium heat. Add the wine, red pepper, and mustard and stir until absorbed by the rice. Add the broth by 1/2 cup increments until it is absorbed into the rice. Once you have added 8 cups of broth (or enough that the risotto relaxes on the plate), add the cheddar, parmesan, butter, and sour cream, stir to combine. Salt to taste. Top with chives. Serve immediately. If using the variation, add the chorizo with the cheddar and parmesan.
Food: Lemon Tomato Risotto
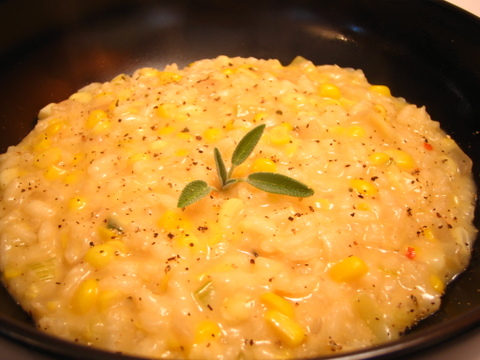
Forgot to take a picture. Here’s one from http://www.restaurantwidow.com instead.
I’m into risotto. It’s one of those dishes that makes you feel really accomplished for taking the time to cook, but is actually really easy. Once you learn the basic ratio (1 cup arborio rice to 4 cups chicken broth) and recipe (brown the onion and garlic, toast rice, slowly add liquid), you can take it any direction you want. I made this last weekend, it’s reminiscent of pappa al pomodoro and great for a fall day. If you want to make it extra decadent, you can add the butter and cream at the end, but you don’t need them for this to be rich and filling.
Lemon Tomato Risotto – serves four
2 cups arborio rice
8 cups chicken broth
1/2 cup dry white wine
1 onion, finely chopped
3 cloves garlic, minced
olive oil
28 oz crushed tomatoes
1 cup parmesan cheese
1/4 cup chopped parsley
1/4 cup chopped basil
juice and zest from one lemon
salt to taste
Optional:
2 tbsp butter
1/2 cup heavy cream
Heat the chicken broth in a separate pot until warm. Brown the onion and garlic in a few tablespoons of olive oil over medium heat. Add the rice and stir to mix everything over medium heat. Add the wine and stir until absorbed by the rice. Add the broth by 1/2 cup increments until it is absorbed into the rice. After two cups, add the herbs and the lemon juice and zest. Once you have added 6 cups of broth, add the tomatoes. Depending on the consistency at this point, you may not need to add anymore broth. You want the risotto to relax on the plate- it shouldn’t be soupy it shouldn’t be solid either. At this point you can add the optional butter and cream if you want to make the dish more decadent, but this also makes it extra rich. Salt to taste. Top with parmesan cheese. Serve immediately.
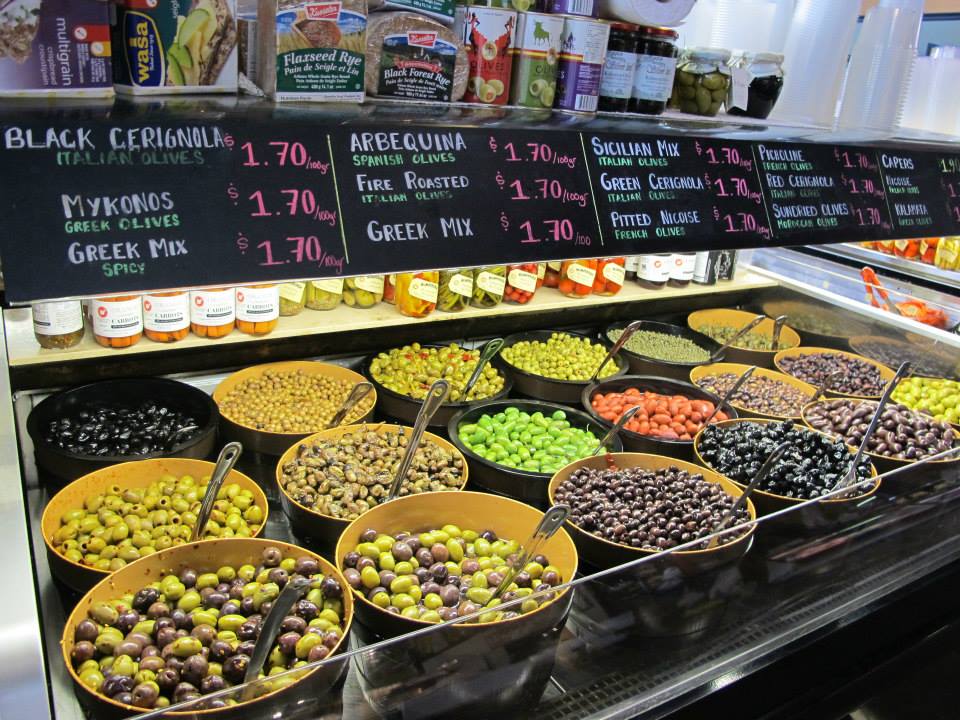
Feast: Life Alive

I consider myself a fairly healthy eater (aka: someone who knows how to eat in a healthy manner and sometimes chooses to do so, other times chooses not to), but when a friend offered to buy lunch at Life Alive, I had a hard time choosing from a menu that reads like this:
The Adventurer: Sesame Ginger Nama Sauce combined with a colorful mix of corn, beets, broccoli, dark greens, shredded cheddar, tofu & tamari almonds over quinoa & short grain brown rice.
My friend gushed: “It’s just amazing food, this big bowl of cozy, comforting vegetables.” I cringed. Cozy is the BBB, soothing is Mio’s Mac and Cheese. Vegetables are crisp, refreshing, something you eat too much of when you’re trying to fit into a bathing suit. Since it’s November, I’m less in the market for vegetables these days. Plus, its the holidays. I want things smothered in gravy, not sesame ginger nama sauce.
Life Alive Cambridge (they also have locations in Lowell and Salem) does not have gravy. Or meat. It goes without saying that the place is proudly vegetarian, with Bragg’s Apple Cider Vinegar and Nutritional Yeast Flakes as condiments. They have reusable silverware and bowls, and bins for compost, trash, and recycling. They are VERY Cambridge.
Here’s the thing: the food is delicious. My friend was right – cozy and soothing actually does describe the steaming bowls of vegetables (also available as wraps). I don’t usually seek out rice or beets, but my favorite dish here has both of those things. The names of the sauces are largely unrecognizable, but they all translate into rich, layered flavor. A “demi” size portion is perfect for lunch, a full bowl is perfect for dinner. Want some extra protein? Add an egg or some avocado. They also sell fresh kombucha, juices, and smoothies – the last I’m staying away from, just so I don’t get hooked and remember that vegetarian food can pack on the pounds too.
If you need to take a break from holiday eating for a meal or two and feel good about yourself, go to Life Alive. Something tells me that come January 1st the lines will be much, much longer.

Life Alive Cambridge

“the emperor”
STILL GOOD: Gingerbread Bars with Cream Cheese Frosting
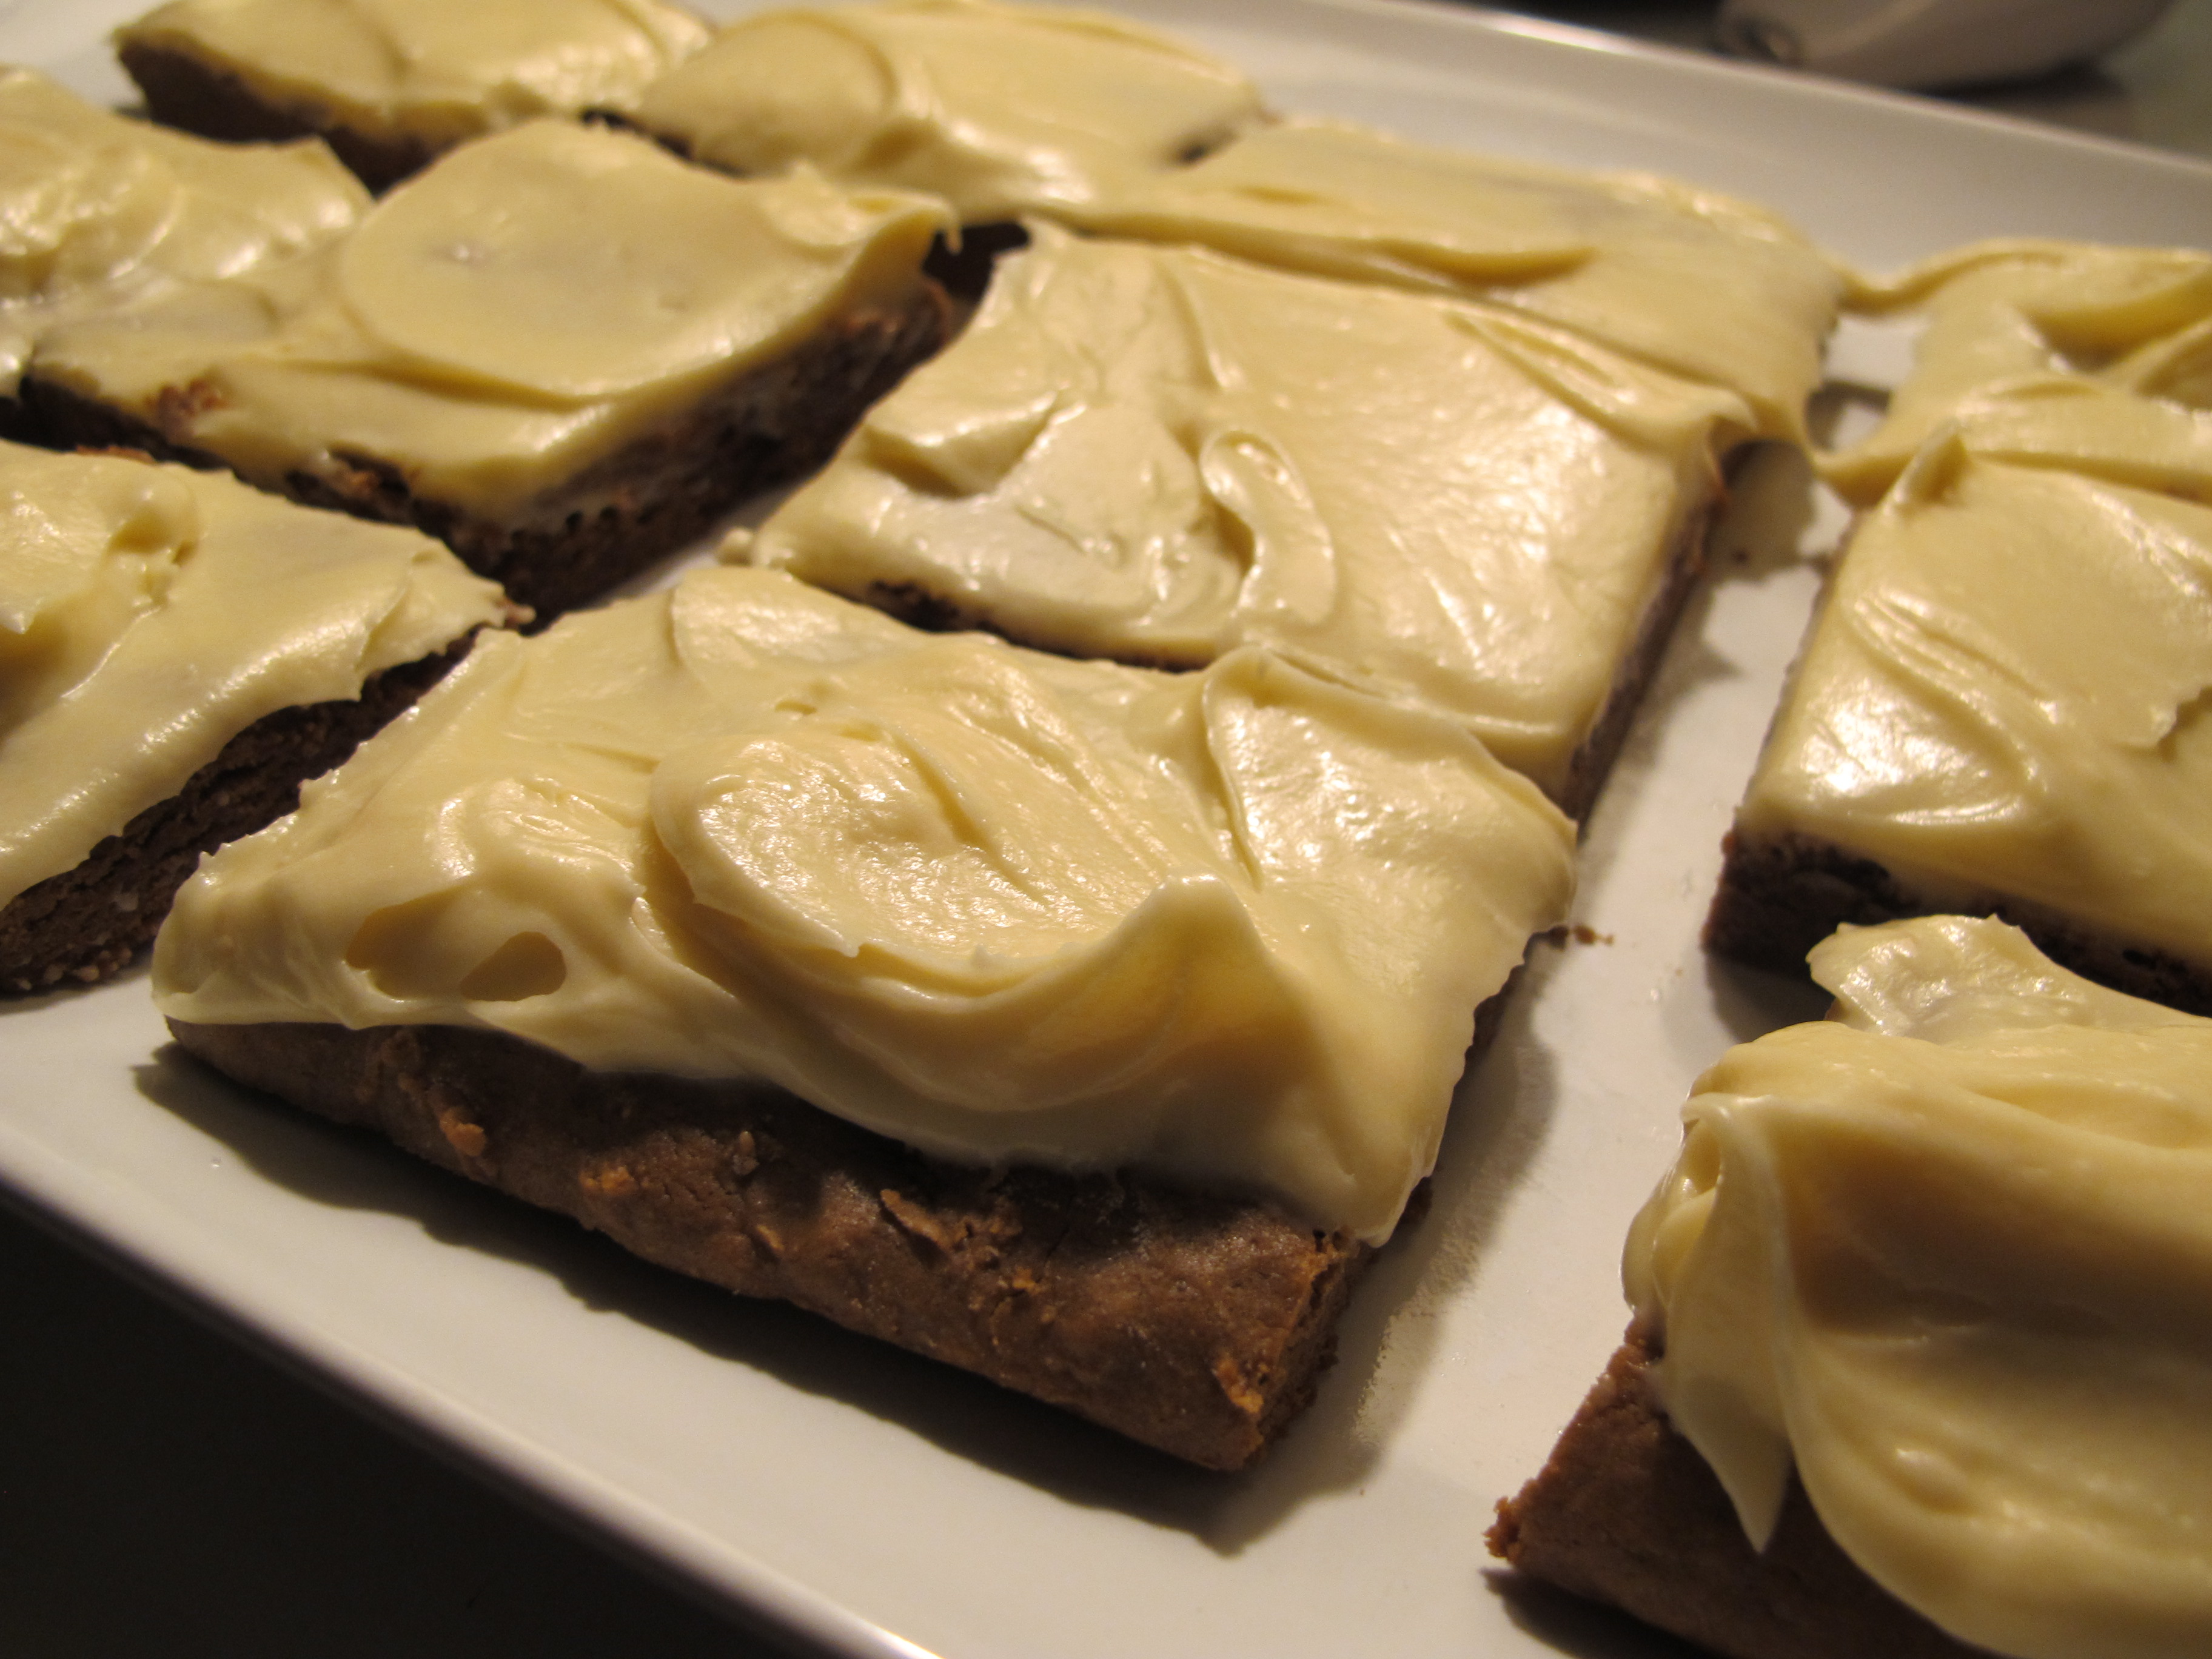
I’ve decided that every time I don’t fail at baking something, it is a miracle. Hence, I’m starting a new feature called “STILL GOOD!” which will highlight any recipes that I assign my typical half-assed baking attention to and still turn out well. Thank you Lauren’s Latest.com for the first recipe: Gingerbread Bars with Cream Cheese Frosting.
Here’s the recipe, and, in bold, the ways in which I messed it up:
*****
Gingerbread Bars with Cream Cheese Frosting
1/2 cup butter, softened
1/2 cup granulated sugar
1/2 cup packed brown sugar
1 egg
3/4 teaspoon vanilla extract
1/4 cup molasses
1/2 teaspoon cinnamon
1/8 teaspoon cloves (FORGOT TO BUY THESE)
1/8 teaspoon nutmeg
1/2 teaspoon ground ginger
1/2 teaspoon salt
2 cups all purpose flour
1 teaspoon baking soda (THOUGHT I HAD THIS, WAS WRONG)
for the frosting-
4 oz. cream cheese, softened (PUT IN WHOLE PACKAGE SO HAD TO DOUBLE RECIPE)
1/4 cup butter, softened
1 cup powdered sugar
1/2 teaspoon vanilla
Preheat oven to 325. Line 12.25 x 8.75 x 1 jelly roll pan with foil or parchment and spray with nonstick cooking spray. (DID NOT HAVE JELLY ROLL PAN. PUT IN GLASS BAKING DISH INSTEAD.) Set aside. In a large bowl, cream butter and sugars together until light and fluffy. (ACCIDENTALLY MELTED BUTTER WHILE TRYING TO SOFTEN. DECIDED TO USE ANYWAY. THEN REALIZED THAT WAS BAD IDEA. PUT MIXTURE IN FREEZER FOR FIVE MINUTES TO TRY TO ERASE MISTAKE.) Stir in egg, vanilla and molasses. Whip 1-2 minutes or until it turns a light brown color. Stir in remaining ingredients and mix until dry ingredients are just combined. (WAS USING BLENDER INSTEAD OF MIXER BECAUSE WAS TOO LAZY TO GET MIXER OUT. BLENDER DIED BECAUSE WAS USING IMPROPERLY. HAD TO FINISH BY HAND.) Press into prepared pan and bake 20-22 minutes or until edges are barely starting to brown. (OVEN TEMP IS STILL WEIRD. THERMOMETER WAS READING 300 WHEN SET TO 325. TURNED OVEN UP TO 350. THERMOMETER STILL READ 300. WHO KNOWS? BAKED UNTIL SEEMED DONE.) Cool completely.
For the frosting- whip all ingredients together until smooth. Spread on bars and cut into squares. Serve immediately or store in air tight container. (EVEN WHEN SORT OF DOUBLED, ICING STILL DELICIOUS. USUALLY THE CASE WITH ICING.)
******
The way I made these they taste kind of like chewy, gingery hermit cookies, which I like. I wish I’d added some raisins. But if they were on the list I probably would have forgotten to buy them anyway.
Feast Cape Cod: Moonakis Diner, Falmouth
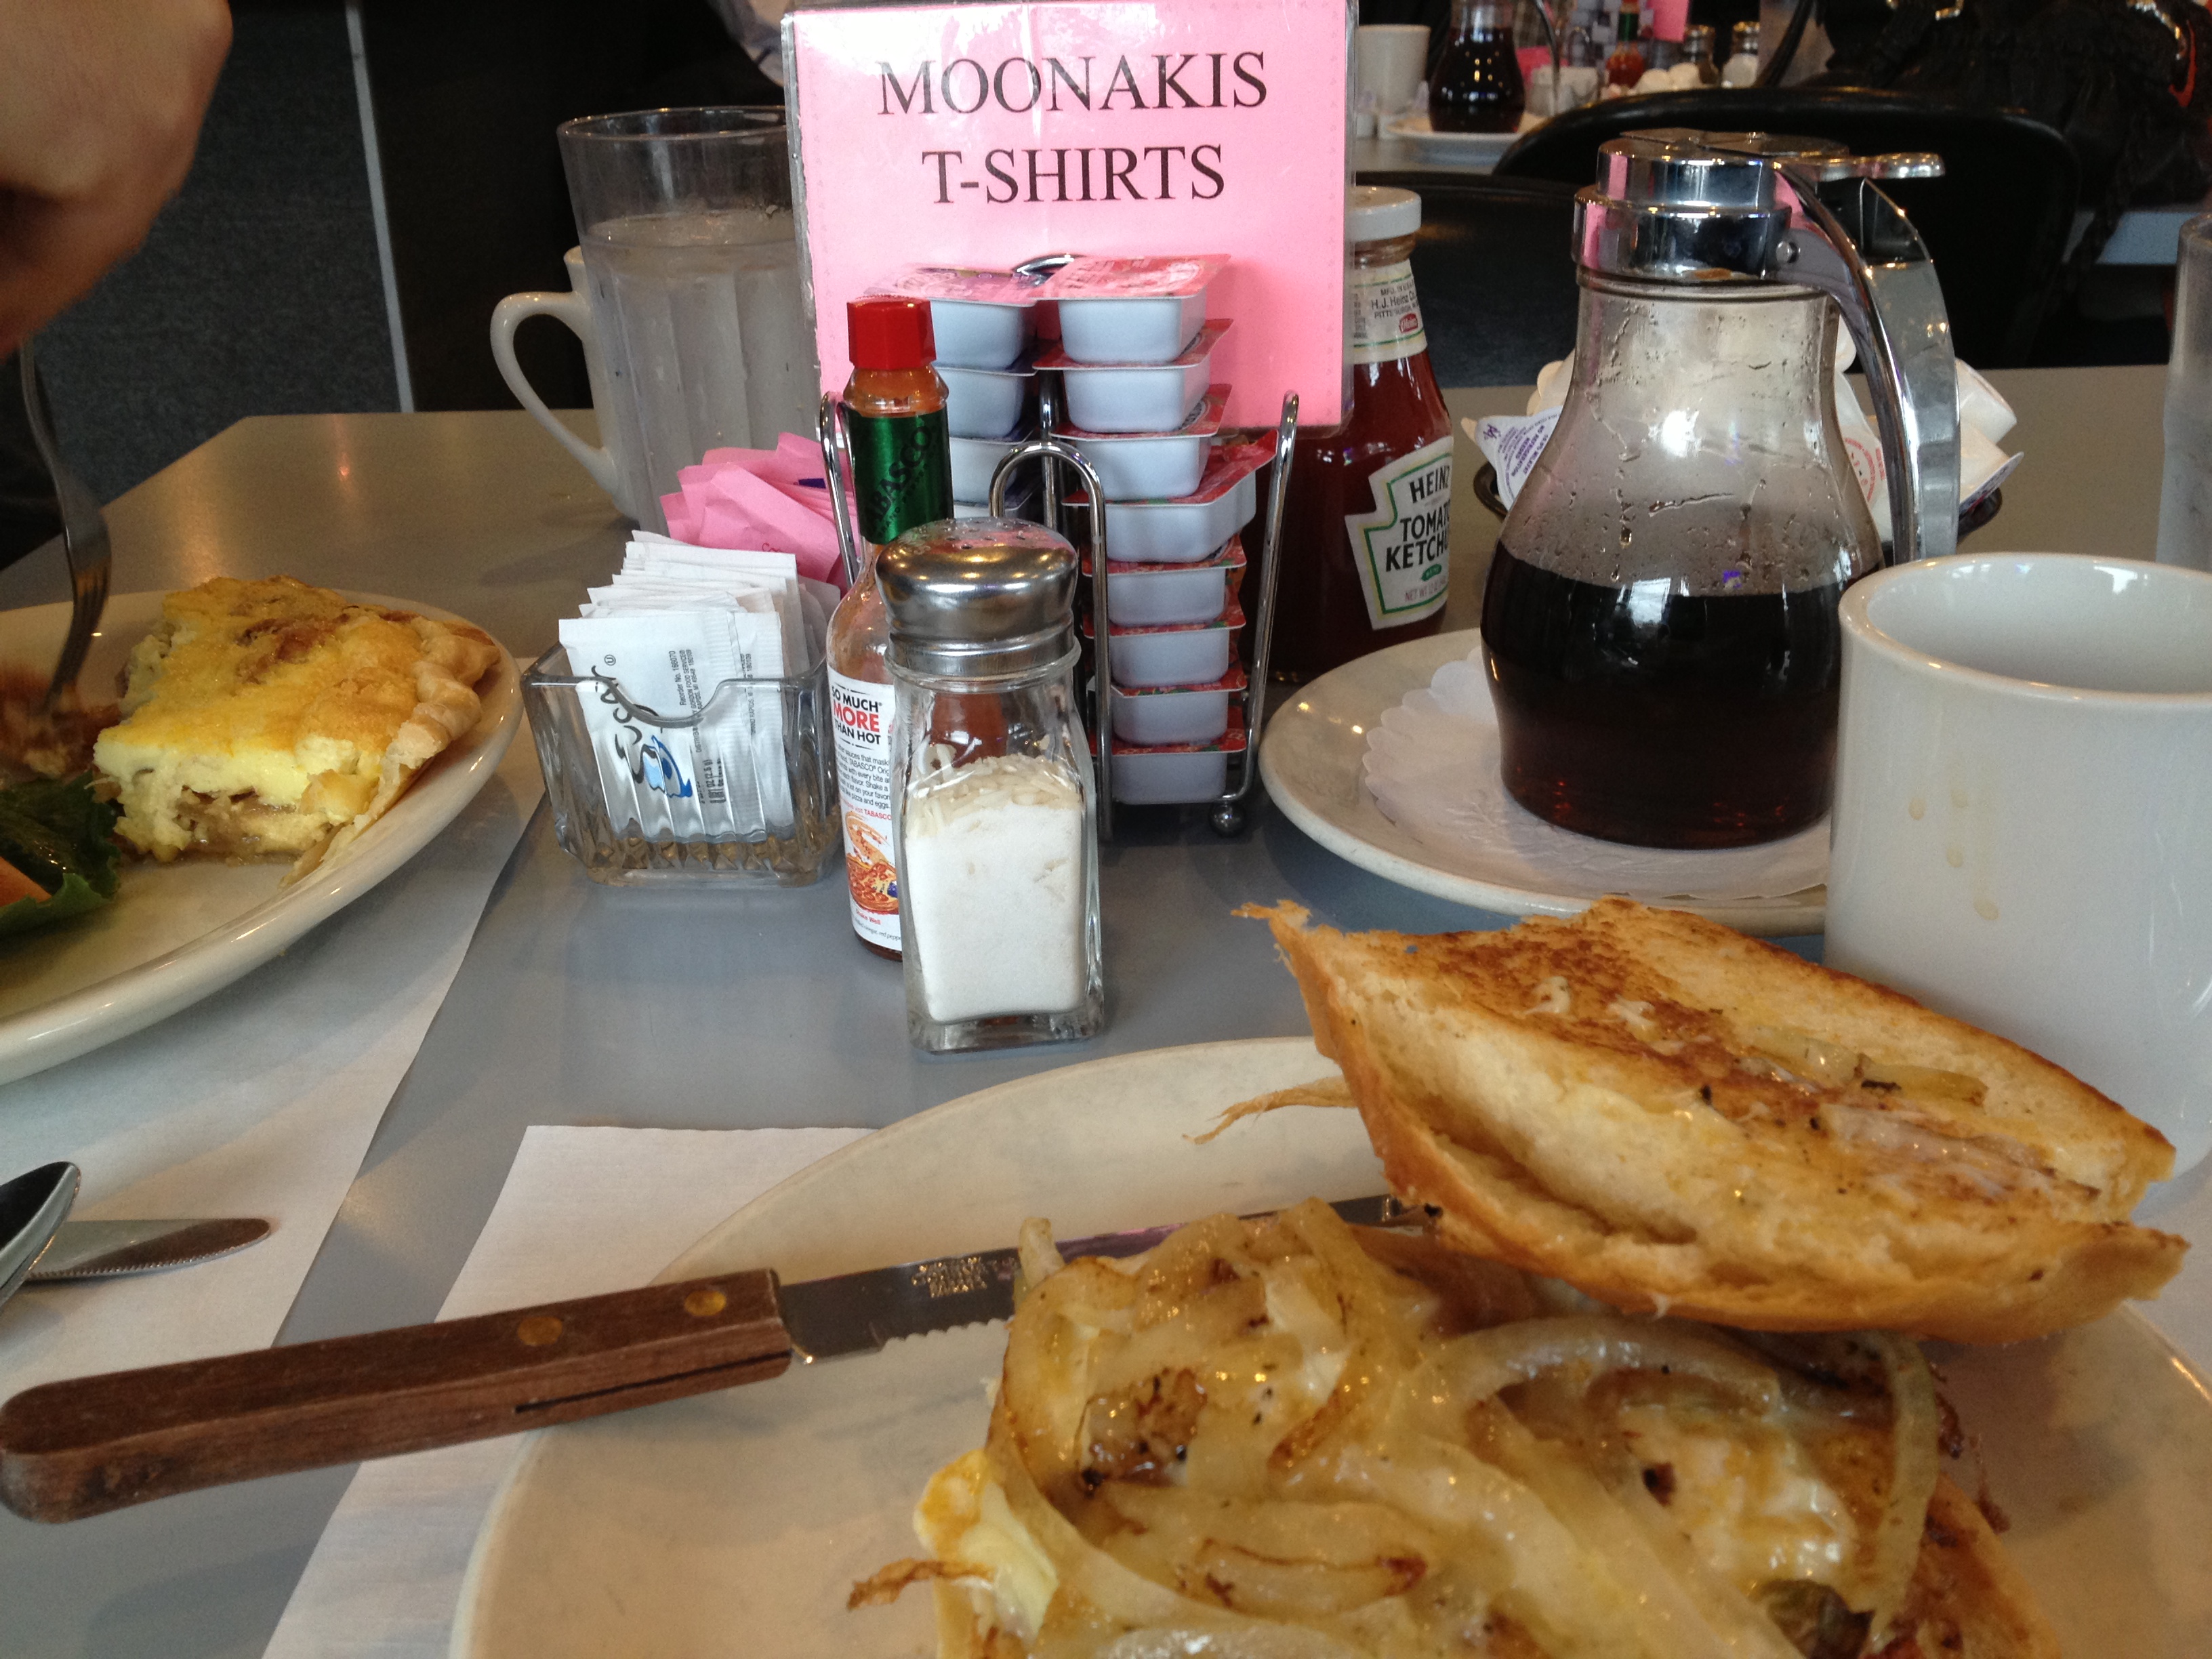
I’ve never had anything I didn’t like at Moonakis Cafe. Omelettes are fluffy, not greasy. Pancakes are slender but still meaty. Potatoes and grilled English muffins round out your main dish nicely. But this weekend I had a Portuguese breakfast sandwich that knocked everything else out of contention. Chorizo, cheese, onions, and an egg on a sweet roll. I’d never had one before, and the combination sounded interesting but not necessarily exciting – but now I’d like to recreate this at home. It’s a good size sandwich but not overstuffed, you could have it for breakfast or lunch without feeling like you need a nap afterward. The chorizo and the sweet roll play well off of each other, and Moonakis grills the sweet onions just enough to have a little snap against the melty cheese. Until they put the lemon poppyseed pancakes back on the summer menu, I’ll be eating this as often as I can.
Feast: Rehearsal Dinner at UpStairs on the Square

Last Friday, my then almost-husband and I shared a fantastic rehearsal dinner with our family at UpStairs on the Square, a Harvard Square institution for over 30 years and the place where my parents first met my now actual-husband. UpStairs had set up the Soiree Room beautifully, everything they served was delicious, and the staff was extremely helpful and generally fantastic. The woman who helped us plan, Caroline Koelker, was a real pro. We had an amazing time and we were looking forward to going back for years to come.
Until yesterday, when I learned that Upstairs on the Square’s landlord has decided to sell the building, and that they will close in just a few months – after New Years. Heartbreaking! Now instead of showing our future kids the place where we had our rehearsal dinner, we’ll have to say “hey kids, see that dive bar?” or more probably “hey kids, see that Banana Republic?”
I wish the gracious owners and fantastic party throwers, Mary-Catherine Deibel and Deborah Hughes, all the best, and I really hope they make a go of it at another location. Thank you both, as well as Caroline and everyone on staff at our rehearsal dinner, for a beautiful event. You will be missed!
Feast: Wedding Tasting at The Charles Hotel
My partner in food-crime and I are lucky enough to be getting married in October. When we chose our venue a year ago, the cuisine was a main concern for both of us, and it didn’t take much convincing to go with the Regattabar in The Charles Hotel – weddings there are catered by Chef Davis of Henrietta’s Table. While I can’t say enough good things about how accommodating and lovely the staff (especially Catherine!) have been during our planning process, they really outdid themselves at our tasting today. I don’t want to give away exactly what we chose, but I am including a few photos that Dave took, showcasing some of the fantastic vegetarian options they have. I am really impressed with how much effort and pride they take with their vegetarian entrees, as well as salads and sides – these courses are so often an afterthought. So happy that is not the case here – I might even get the vegetarian option myself!

risotto stuffed squash with tomato pan sauce

tomatoes and mozzarella
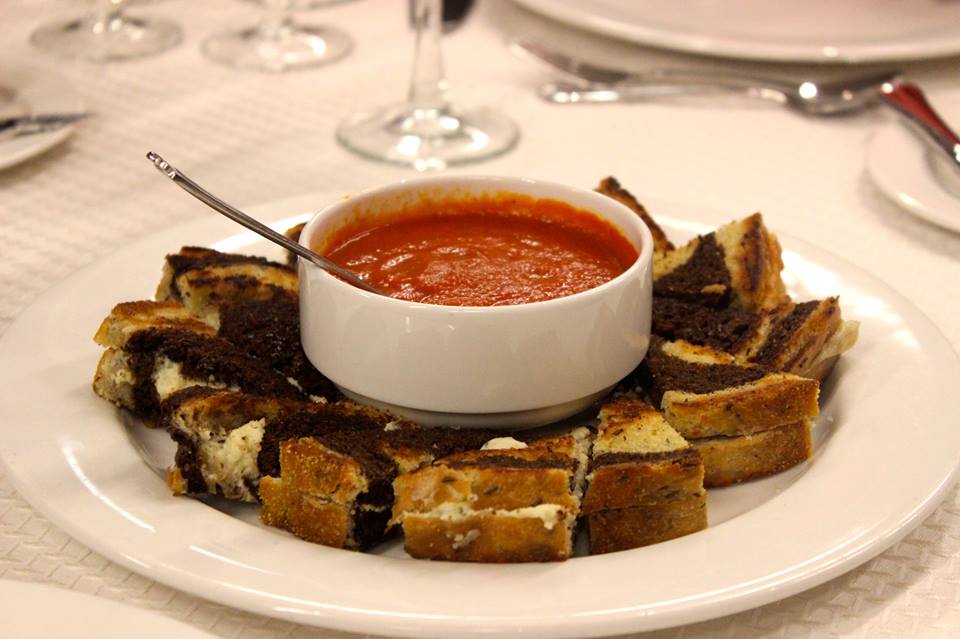
grilled cheese and tomato soup
